Tuesday, 26 March 2013

How to make a mini bookmark

How to make a mini bookmark


Tools and products you will need for this project

a)   Piece of card (10cm or 4.25" long by 5cm wide) (can be matching the card used to make the Post-it Note holder - see previous blog)
b)   Contrasting card - 4cm square (we have used the Woodward Giant 2.5" Scalloped edge punch - click here for a link as to where you can buy it from Handy Hippo
c)   Decoration for above
d)   Hole punch and eyelet - we have used the Crop-a-dile eyelet setter with a 1/16" eyelet - but see below to watch a video from www.stamptv.ning.com to see how you can use just a pen to set an eyelet in a card project - really useful video**
e)  Ribbon or Baker's twine 
f)  Corner rounder - we have used the the Woodward corner punch which you can get from Handy Hippo


Instructions how to make it 

1)  Cut your card to 10cm x 5cm - if you have made the Post-it note holder from our previous blog you should have a piece of card left over that will do for this.
2)  Round all the corners with the Woodware corner punch
3)  Punch a square from the contrasting card using the Giant 2.5" Woodware punch
4)  Place the square at the top of the other card and using your Crop-a-dile punch through both pieces of card - approx 1cm from the top
5)  Using the 1/16" eyelet, place it through both pieces and secure it using the Crop-a-dile - this will mean that the contrasting square will be attached to the base card but there will be space for you to place it in the book at the place you need it

6)  Add whatever decoration you would like to this piece of card - I have used a Celtic Square peel-off sticker - Multi on black  (small one) from Craft Creations 
7)  Then add the ribbon or Baker's twine either knotting it or by doubling it up, threading the looped end through the eyelet and then pass the loose ends through it to attach it.

And there you go... one very easy Bookmark that is slightly different from your normal one!

How to use a pen to set an eyelet in a card project video from www.Stamptv.ning.com   

Saturday, 16 March 2013

How to make a Post-It Note holder present


Post it note holder (3 inches Post it note pad)

Tools and products you will need for project


Post-It note pad 70x70mm - 
colour of your choice


CARDSTOCK

Colour of your own choice that either matches or co-ordinates with the pad
Dimensions and pieces you will need are:-
1 piece - 10x20cm (approx 4 x 8ins) (if cardstock is less than 240gsm then you might want to have 2 layers - both Handy Hippo and CraftCreations have a brilliant range of cardstock available at reasonable prices
2 pieces - 9x10cm (for inside covers) 
2 pieces - 2x10cm (for front and back covers)
1 piece - 9x6.5cm for the inside back where the Post-it Note pad will slide in
1 piece - 1x10cm for spine (optional)
2 tag shaped pieces of card for front and back


OTHER PRODUCTS AND EQUIPMENT YOU MIGHT NEED
1 co-ordinating button
Ribbon - co-ordinating or matching (optional) 1cm wide 20cm in length
1 length of Bakers twine (again co-ordinating or matching)
Glue dots, adhesive (I have used both Crafter's Companion adhesive and 1/8th inch Scor-tape

Crafter's Companion Clever Cut


Crafter's Companion Top Score Multiboard and scoring tool
Woodware Craft Collection Tag punch
Scissors, Rulers 


HOW TO MAKE YOUR PRODUCT!

TO MAKE THE BASIC COVER
a) Cut your card so you have all the pieces ready - I have used the Crafter's Companion CleverCut as there is the option of deckle edging if you want it
b) Score card at 9cm and then at 11cm and fold into a book shape


b)  Glue the 2 9x10cm cards into the both sides of the inside cover
c)  Glue or tape the 6.5x9cm card on to inside back cover on bottom and left and right sides leaving enough space for the post it note to slide in


c) Glue 1 strip of 2x10cm on to the inside spine (optional) - you can also put this on the outside spine instead
d) Glue one piece 2x10cm on the right hand side of front cover


HOW TO DECORATE YOUR PAD HOLDER
f)   Stick your ribbon around the holder in the centre of it - making sure it is straight  

g)  Thread the button with the matching bakers twine – either making a knot or a bow (whatever takes your fancy)
h)   Then place the button on one of the tags using a glue dot or foam tape so that it is raised up from the card so the loop can go round it
i)   Glue the tag in the centre of the front cover over the strip and make sure it is at the same level as the top of the inside flap (for the Post-it Note holder)
j)   Cut another length of bakers twine which is long enough to make sure that it will loop round the button comfortably and be “slack” enough to be able to open it with ease – once you are happy that it is ok – tie a knot in it and sellotape it down on the back outside cover at the same height as the button on the front cover. 

k)  When you are happy with it being at the right tension and height, then glue/stick the 2x10cm strip over the twine making sure it is covered – 
l)   When that is done then glue/stick the tab over it making sure it is the same height as the “flap” and the front tab
m) Then slide the post it note pad backing sheet in the flap and position it so it fits properly


A KIT WITH ALL THE NECESSARY CARD AND EMBELLISHMENTS WILL BE AVAILABLE TO BUY SOON - I WILL ALSO BE PUTTING A DOWNLOADABLE TEMPLATE ON MY WEBSITE IN THE NEXT FEW DAYS - www.handmdadecardsshop.com 

And there you go…


One lovely present! 

Sunday, 27 January 2013

From then to now - how things are progressing...

From the 1st card to now - how my designs are hopefully getting better using different imaging products....


Imaging Software packages..

Looking back to the first few cards I designed and made, I am struck by how different they are now - as the old cliche goes - "practice makes perfect" - well not perfect but getting there...

The first design I produced was on Microsoft Publisher (at that time I hadn't realised there are so many great packages out there - a lot are free too though if you want more detailed designs then you do have to spend a bit of money - but they are definitely worth it... 

I think the various software programmes from Serif are really good - I use their Craft Artist 2 professional and their DrawPlus5 for some designs - they include options for punching and stamping images which can be great - you can also produce decoupage style things too!

For other projects I also use the Corel Paintshop Pro X3, Paint.net (they are really good for resizing images by pixels or percentages - great for making sure that your design isn't enormous when adding to your blog or website...and is a free programme too! I would love to be able to use Illustrator or Photoshop but will have to wait for those...

Naturally there are so many other packages out there that might be better and it would be great to hear from anyone who knows of others that might be of use!


Saturday, 29 December 2012

Transform an ordinary A5 notebook into something special!


Have you ever had a notebook and thought it looked a bit boring? Then here is how I have transformed an ordinary Black n Red A5 spiral bound notebook into something personal to me - you can make these to give to people or just keep it yourself!


Products you will need for this project: 
  • A5 notebook (I have used a Black n Red notebook but you can use any plain one)
  • Patterned paper or card (2 pieces of A4 - 1 cut into half) (I have used A4 sheets bought from Craft Creations which is really good quality)
  • Green frame (you can use these from my Fizzy Designs collection) or any design you like
  • Contrasting backing card for the frame (I used the 4" strips of green and white spotty paper which you can get again from Craft Creations
  • Raffia (Contrasting/matching)- optional
  • Crafters Companion Double sided Adhesive tape (available from Handy Hippo)
  • Craft Creations fingerlift tape 6mm
Stage 1

1)  Take the notebook and measure both front and back covers (taking into account the spiral spine) - approx 150x203mm
2)  Cut 2 pieces of the patterned paper to cover both covers again using either double sided adhesive tape - I like the Crafters Companion double sided adhesive tape roller (which you can obtain here) or the double sided 6mm fingerlift adhesive tape which can be bought here

Stage 2

3)  You now need to make the edging for both the front and back of the notebook - as you can see from the design, I have chosen a contrasting green and white spotty paper which you need to cut to 40x203mm which you need to then attach covering both sides of each cover (making sure they are equal) 

Stage 3

4)  Cut out the frame carefully and glue it to matching card (100x100mm approx) and place it about 13mm from the top and centre it

Stage 4

5)  You can then glue some contrasting ribbon or raffia to the edge nearest the spiral spine


Stage 1 Part 1


Stage 1 pt 2
Stage 2 pt 1


 Stage 3 (above and below)
   
Stage 4 - completed notebook

Tuesday, 20 November 2012

Handmade versus shop bought?

Handmade versus shop bought?

I have been trying to think what the USP of my new venture is over the past few weeks as I have been gradually designing my website ( www.handmadecardsshop.com ). 


Why and what makes my cards different to others people can find in all the usual shops?

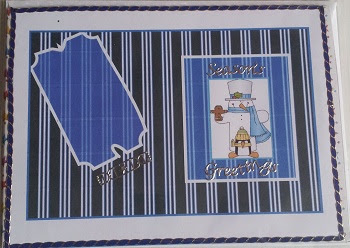
As you can see from the gift tag above, I have designed it to be given to someone whose name begins with L, she also loves red and white spots and voila! She also liked making craft items and her nickname was given so I designed the following to make the envelope a bit more exciting and personal!


Oh I know you can visit those big card companies and get things personalised but can you get all the added on bits and pieces too? Like this personalised card  I made and gave to my daughter and her boyfriend as their birthdays are close (and they had a visiting cat that they'd nicknamed Fatty.....


The cards and gifts might be a bit more expensive to buy but I think if you put in all the time spent thinking of the best way to show how much the person cares and how much longer it does take to make them I think it is a no-brainer (as the saying goes).

So, if you are thinking of your Christmas card list now (and the last posting date for Christmas to some parts of the world is only a couple of weeks away - why not think about sending a personalised, handmade card like this one? You can buy this here 

Handmade Snowman card, Christmas Card, Personalisation available, Happy Christmas Cards, Season's Greetings cards
This can be personalised with either a photo or a name!
Right, better get back to work - more anon!

Saturday, 3 November 2012

Third blog - now this is definitely some form of record!

Since the last one, I have been really busy with the design of my website - I have to get used to accepting that it is ok and not be constantly trying to make it just right - that can be done at a later date....

I have spent the last week both working at my daytime job (though I did have a day off to see my daughter (and then the next day off to recover from the pub lunch.....need I say more?...)

As several people have commented, I do need to widen the number of products that we have to offer and am now looking at what sort of items might complement our range? At the moment I am concentrating on Christmas gifts etc but it is probably a bit too late to get anything for this year, so am now wondering about Valentine's Day gifts, Mother's Day and so on.

One of the Companies I use for some of the designs, has a brilliant range of images of old fashioned recipes and I am planning (or would like to) to offer a card, recipe book and the actual recipe made up as a gift - I don't do cooking as I haven't got the relevant equipment but would love to hear from either an individual or company who might like to do this for me? I think these would make brilliant gifts for Valentine's Day, Mother's Day and Easter especially - so if you know of anyone who might want to do this - please let me know! I can be contacted here


Anyway, back to the website......

Sunday, 28 October 2012

Having spent most of the weekend on designing my website, I have come to the conclusion that there must be a website provider out there that is a mix of the 2 that I use. 

I don't know about other people, but I find the templates that are on offer (and I know there are  hundreds) quite restricting - I find one that I like and then find you can't change the background colour or the size of each column. I then find another one that I think "hurray" but then find the colours aren't right - hmmmm.

So, I am now using one that allows me to design the template I like, but because it is based in the US, doesn't offer the proper shopping cart facility I want. I am therefore having to create each Paypal button individually which is SOOOO time consuming. I want to be able to amend the HTML which I think I can do if it is non-encrypted but if it is (which is recommended) I can't just copy and paste the original code and amend it to the next product. If there is any techie type of person who might read this and could help me with this predicament then I would be so grateful.

I have tried to use one UK based provider for some time now but the limitations of size of image etc means that I am forever trying to add images to it - so I have given up on it - but the shopping cart is what I want. 

Confused? Me - well perhaps I am but I am going to persevere with the original one until that magical day when there is a perfect provider out there!

Snowman Christmas Card - Season's Greetings - personalisation possible £2.25 inc p&p